
 Most of you, who are into development and web development, has doubtlessly known about Ruby on Rails, which is a server-side web application framework, and make the work of the developers, significantly simpler by offering various features. If you have begun learning Ruby, or need to create server-side web applications, you should install it on your PC, either on Windows or Linux, so as to begin.
The installation procedure isn’t that complicated, here this informative assist you to learn how to install each piece of Ruby on Rails step-by-step manually. This tutorial will walk you through installing this on a development environment for Windows 7, Windows 8.1, and Windows 10.
To build up a web application utilizing Ruby on Rails Framework, you have to install the accompanying software first −
- Ruby
- The Rails Framework
- A Web Server
- A Database System
We assume that you already have installed a Database System and a Web Server on your laptop. You can utilize the WEBrick Web Server, which accompanies Ruby. Most sites, in any case, use lightTPD or Apache web servers in their production.
Rails work with numerous database frameworks, including SQLite, Oracle, MySQL, PostgreSQL, DB2 and SQL Server. Please refer to a relating Database System Setup manual to set up your database.
Step 1 – Check Ruby Version
For Windows installation, the primary assignment is to guarantee, Ruby isn’t installed on your framework, or there will be consequences, and order to check that simply open Command prompt, and type ‘ruby – v’. In the case that you get some issue, Ruby isn’t installed on your framework. Yet, if you can find the version, and the versions are something above 2.2.2, simply type ‘get – version’. If you get an error, you should install Ruby, and the procedure is given here.
Step 2 – Install Ruby
In any case, Ruby isn’t installed; at that point download an installation package from rubyinstaller.org. Pursue the download link, and run the subsequent installer. This is an exe document rubyinstaller-2.2.2.x.exe and will be installed in a single click. It’s an extremely small bundle, and you’ll get RubyGems also alongside this bundle.

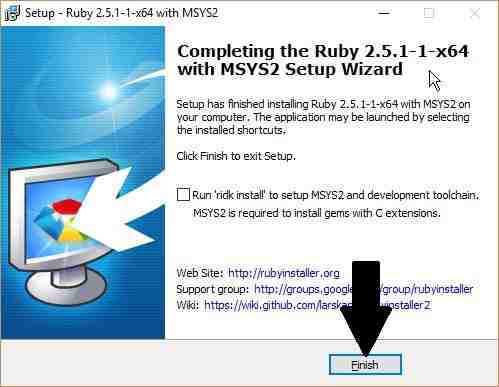
Launch the development kit
Presently, uncheck the alternative to launch the development kit after installation, and click on ‘finish’. Presently running of ruby on windows is conceivable.
Step 3 – Installing Rails
After completing the installation of Ruby, now, it is the time to install Rails.
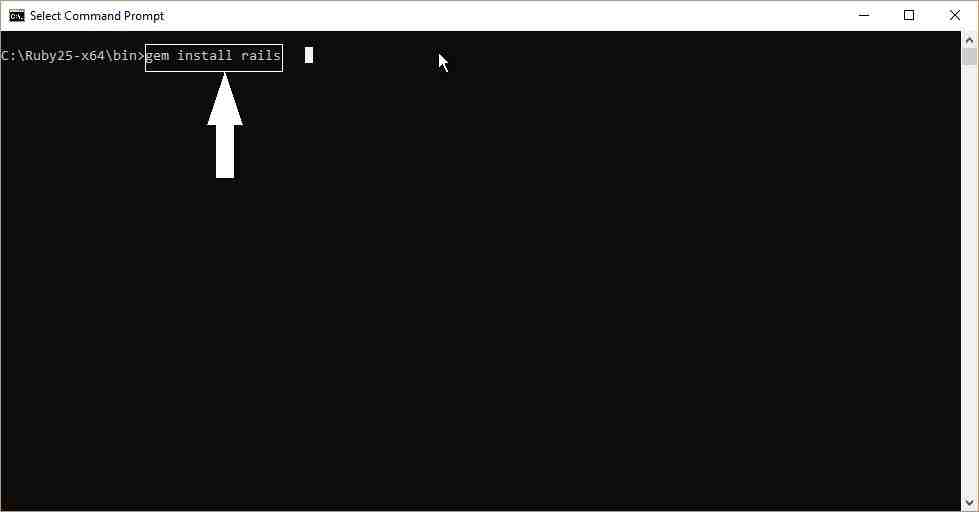
Simply open ‘Command Prompt’, and type ‘gem install rails’. Click the enter key.
Now explore to ‘C: Ruby25-x64bin’ inside ‘Command Prompt’, and type ‘gem install rails’, trailed by clicking the enter key.
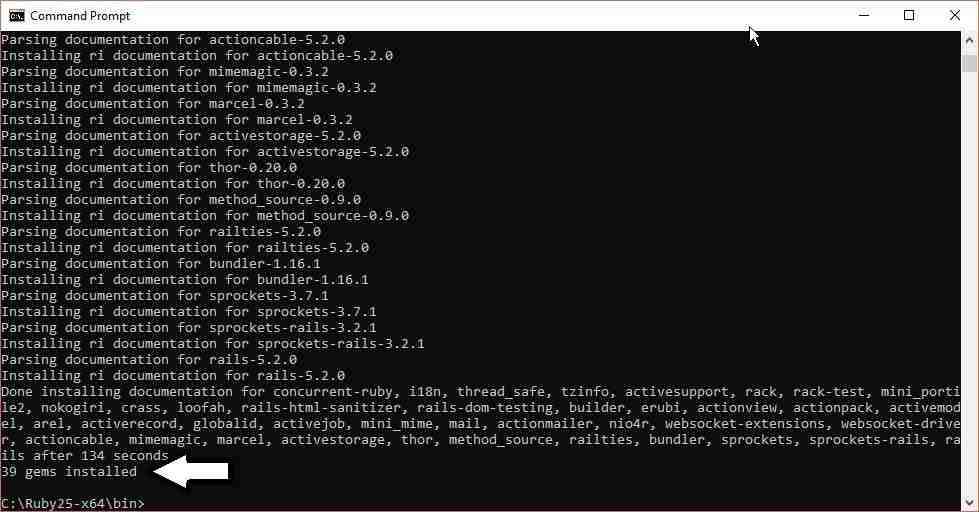
Now the installation will begin. You may get a message from Windows Firewall. Click on ‘Allow Access’ to continue with the installation procedure. The installation will take a lot of time, and you should stay connected to the internet, as long as the procedure proceeds.
Once the installation is finished, you will get the accompanying screen on ’Command Prompt’.
The Rails installation on Windows is finished. So as to guarantee, everything has been installed, simply type ‘rails – v’ and hit the enter key again to discover the version of Rails installed. You can likewise utilize the previous directions to check the version of the Ruby and Gem, to guarantee, they are appropriately installed.
If everything is installed appropriately, the directions will restore the form of Ruby and Rails, with no issues.
Hope that you have your ruby on rails installed well. However, if you have any extra questions in your mind? Don’t hesitate to comment it down below.


Recent Comments